You need to place the iPad-compatible video and XML file directly into ClipNotes on your iPad using iTunes; you can not access files stored in your regular video library.
Step-by-step guide to transferring and opening ClipNotes files:
1. Connect the iPad (where you’ve already installed ClipNotes) to your computer and then click on the “iPad” button that appears in the upper right area of your iTunes.

2. You’ll now see your iPad name on the top left (“bryPad” in this case). Click “Apps” to bring up the application interface.

3. Scroll down to the File Sharing window, where you’ll see “ClipNotes” in the list of apps on your iPad.

4. Select ClipNotes, and the panel on the right will show what video and XML documents you have already transferred to your iPad. To add files, either click the “Add…” button or simply drag files into this window.

(Large files will take a few moments to transfer.)

5. Once you’ve copied the files into Clipnotes on your iPad, open your iPad Settings.
![]()
6. Scroll down your settings menu and tap on ClipNotes.
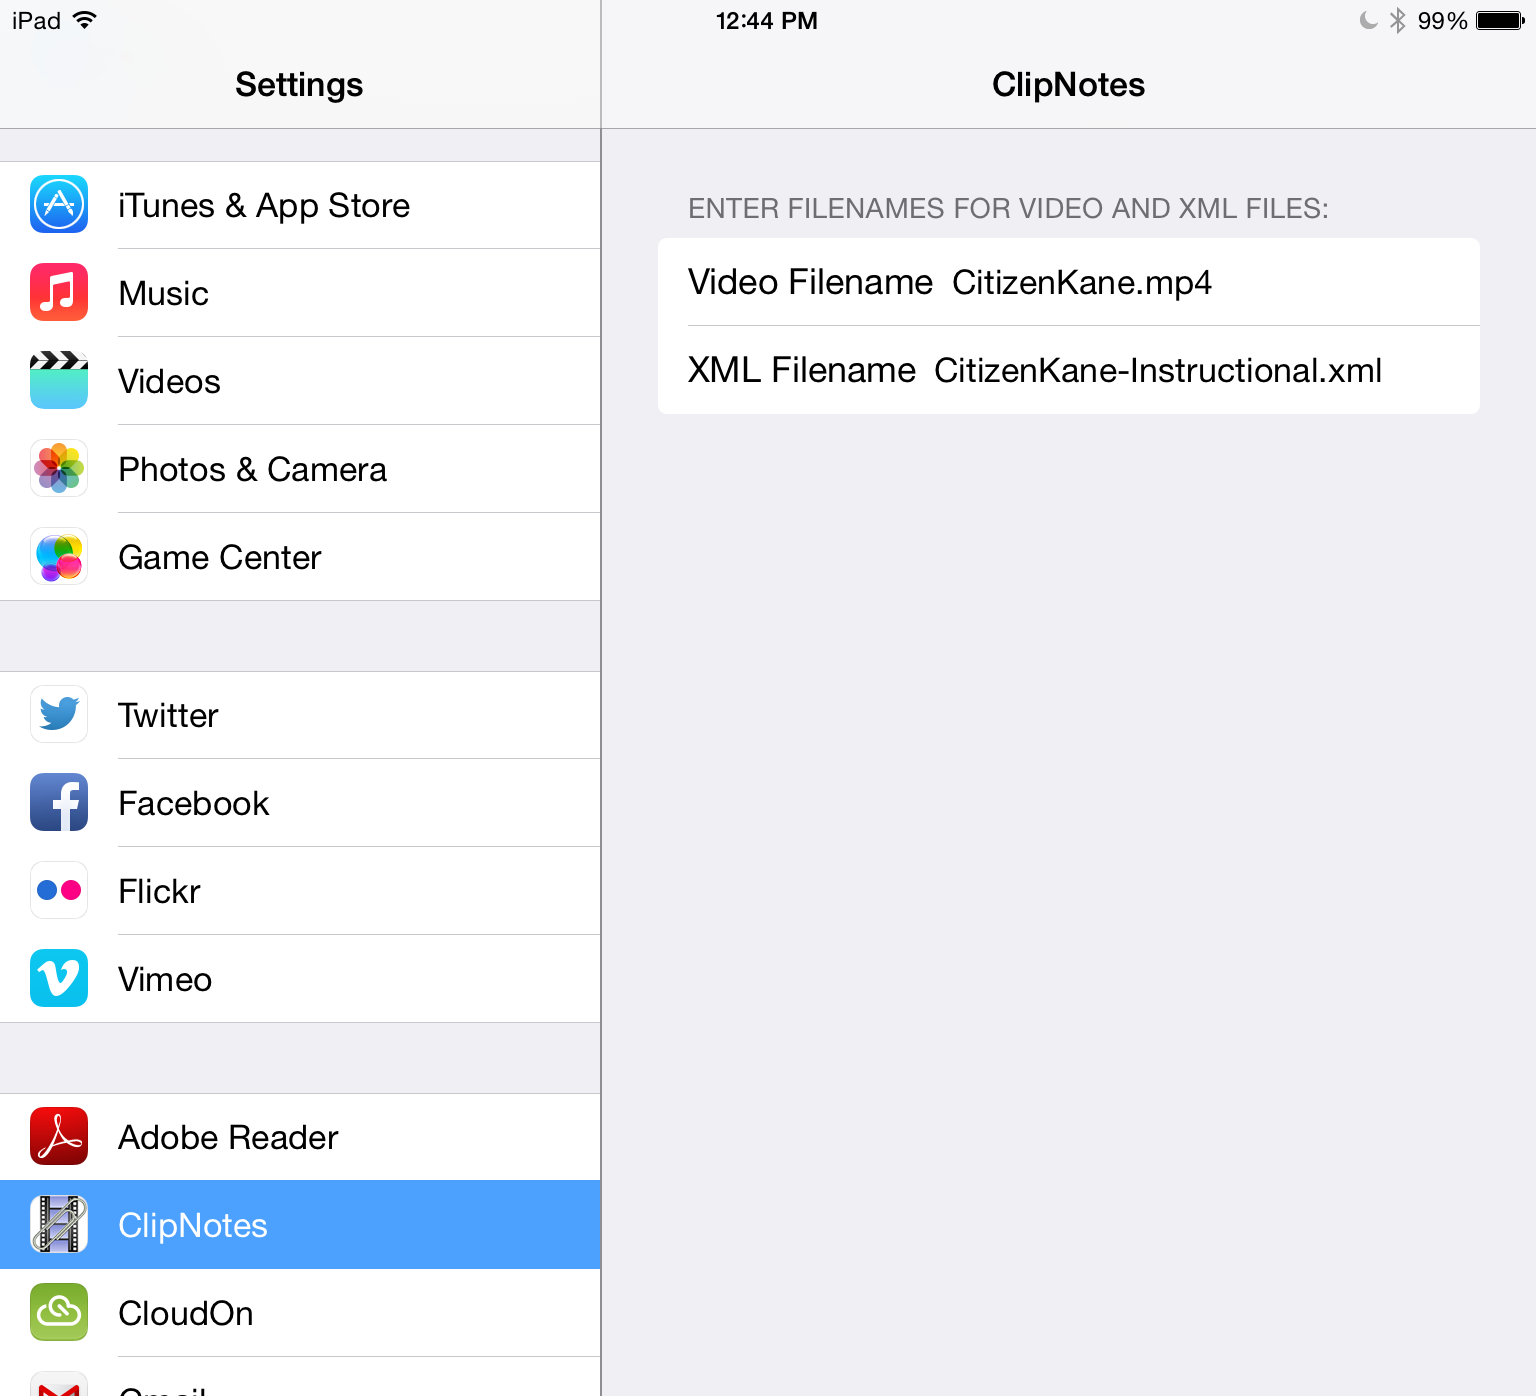
7. Tap the filename fields and enter the exact name of the video and XML files that you imported through iTunes. Double check spelling, capitalization, punctuation, and the format, as any error will prevent ClipNotes from loading the files.
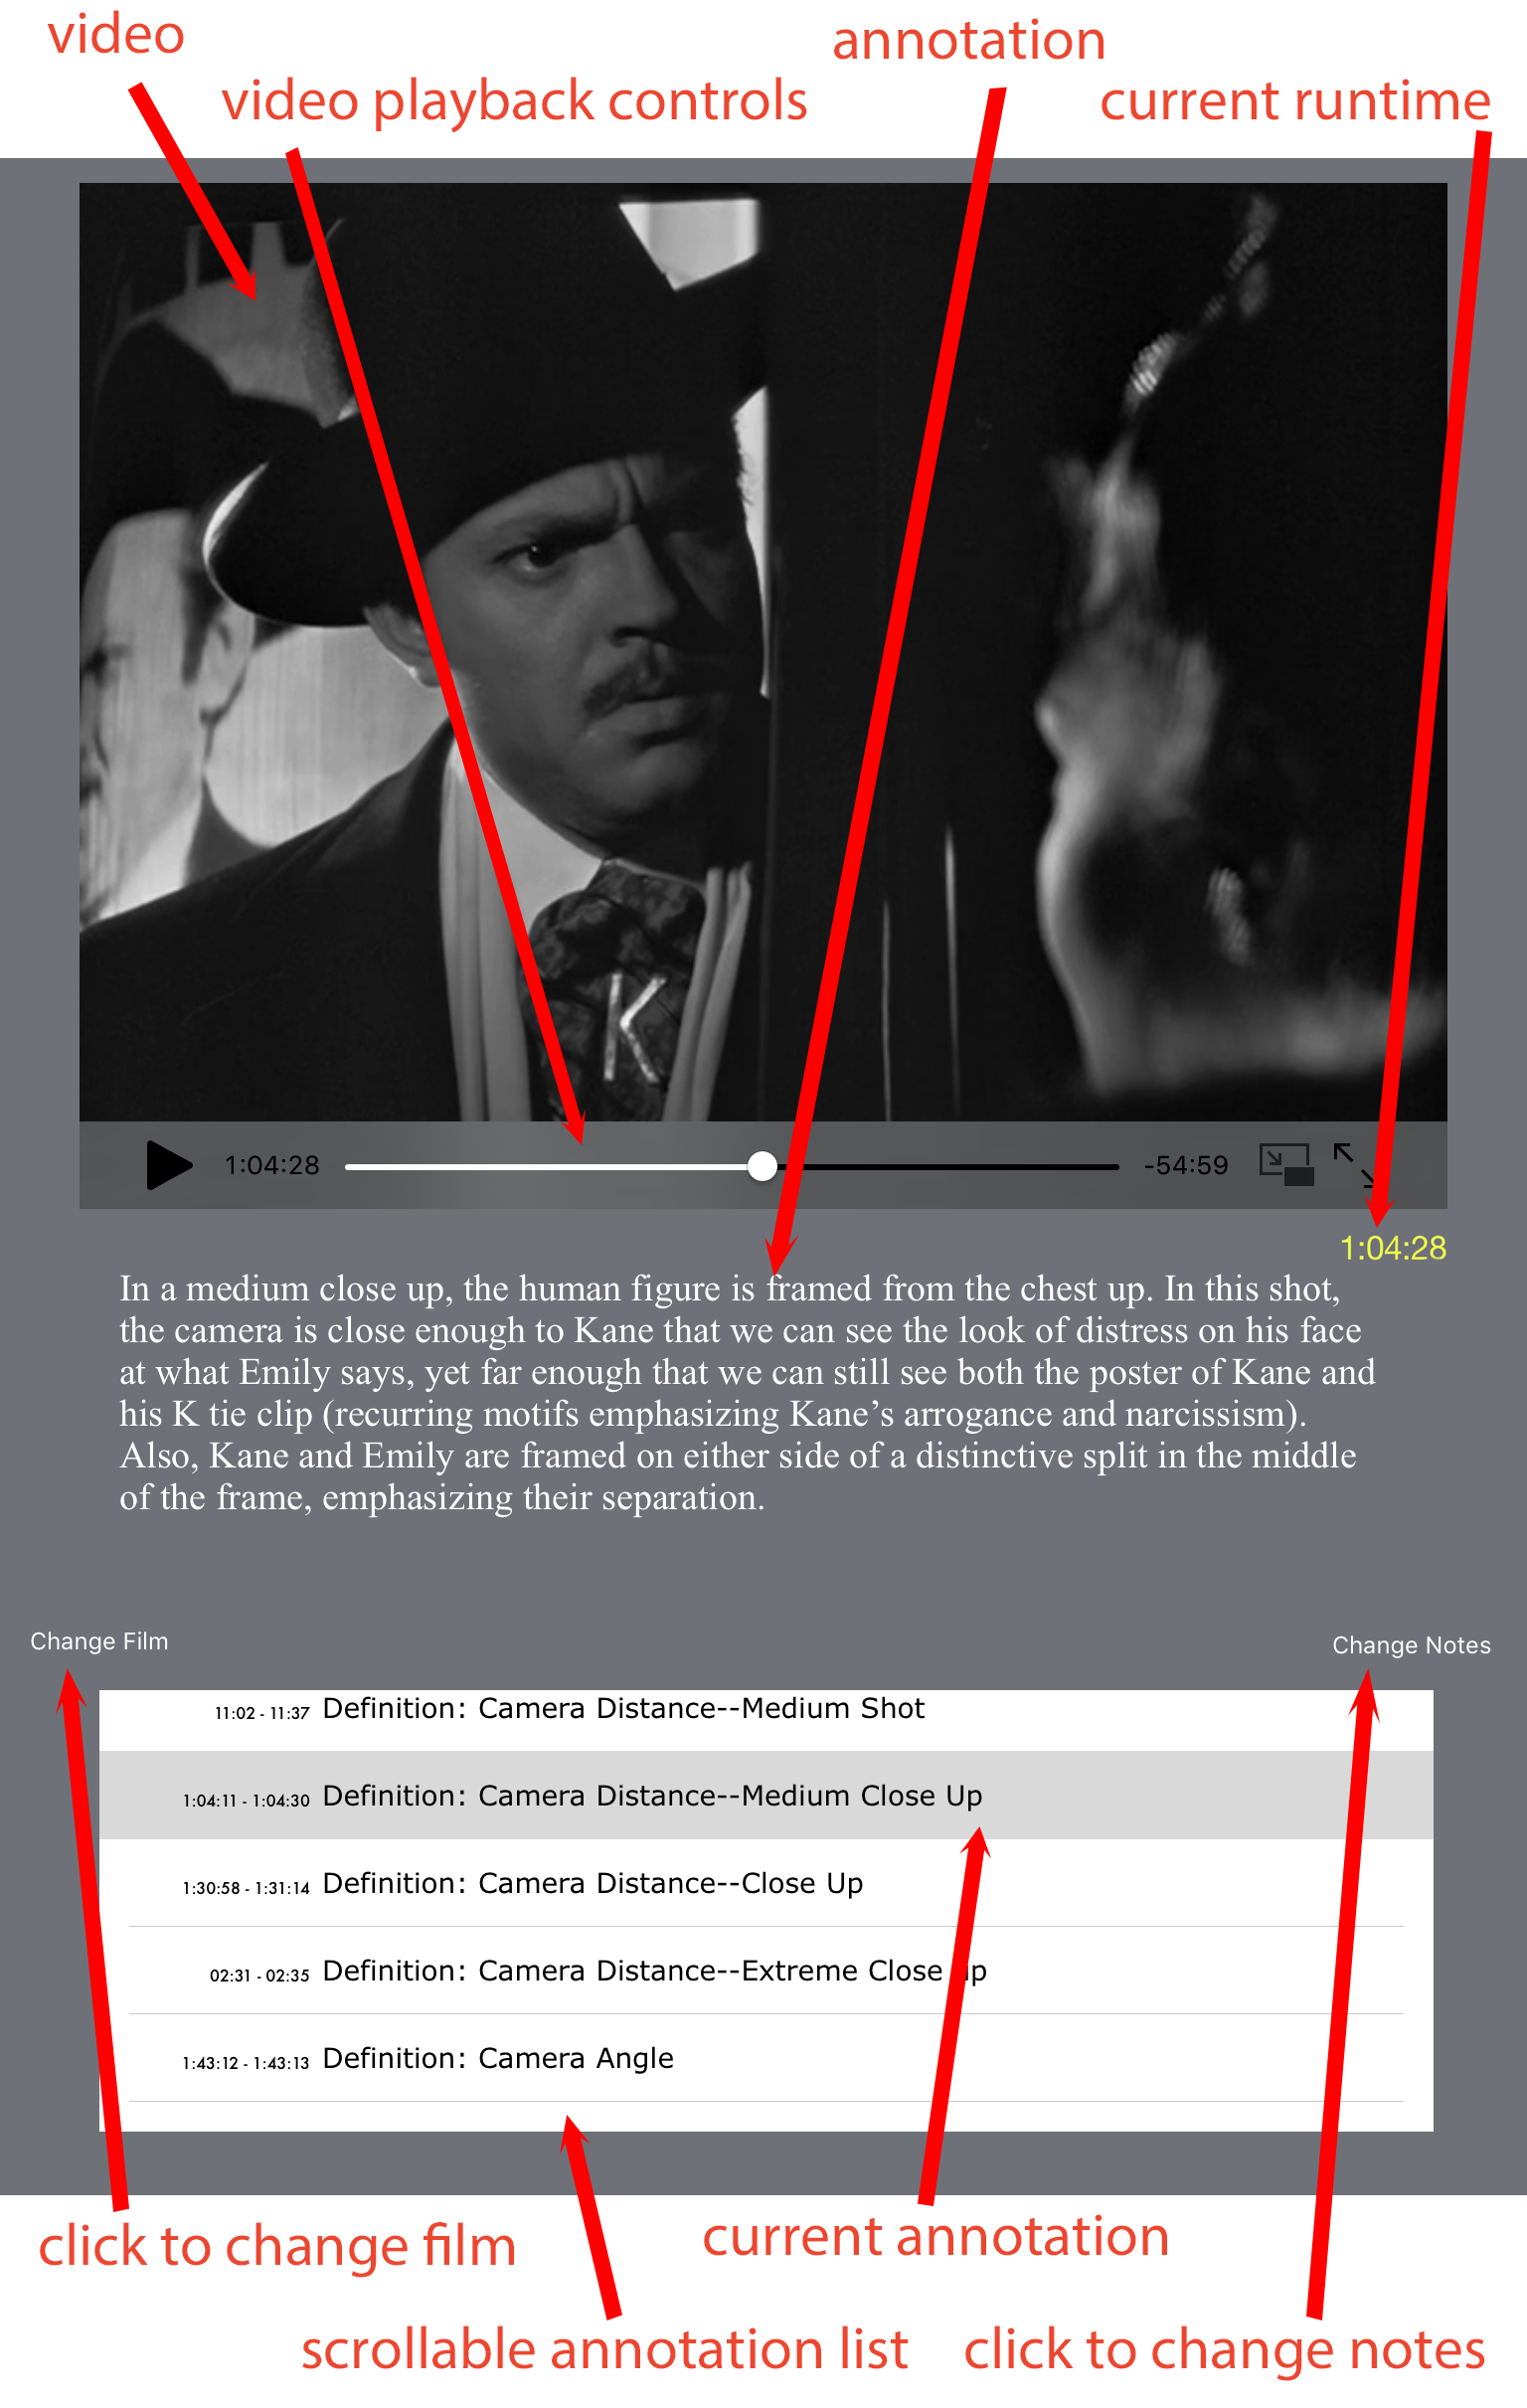
8. Once you’ve correctly entered the file names, open ClipNotes and begin viewing the presentation. Scroll and tap clip titles to play them.
9. To access another film you’ve already imported into ClipNotes via iTunes, simply close ClipNotes, reopen Settings, and type in the file names for other video and XML files. When you reopen ClipNotes, you’ll now see the new presentation.